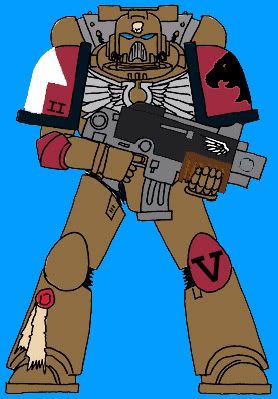
Tuesday, September 12, 2006


Wow, He's a Big 'un

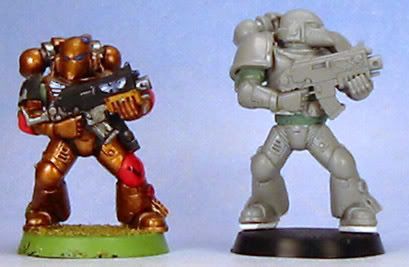
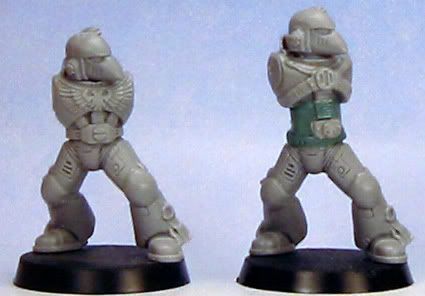
Not sure if I will have time to do any more work on this guy - as my vacation looms near.. but, I posted my sample pics on one of my favorite Marine forums (Bolter and Chainsword) and solicited for opinions on this guy. I mostly got back comments on the legs being too out of proportion to the torso, actually, that was the overwhelming opinion :P

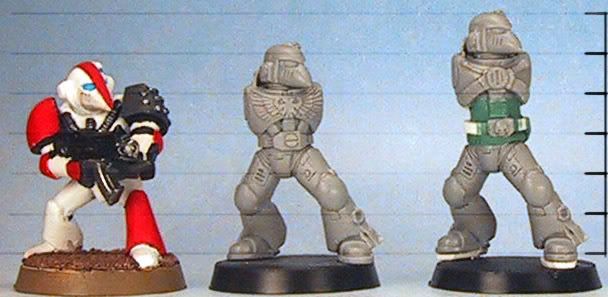
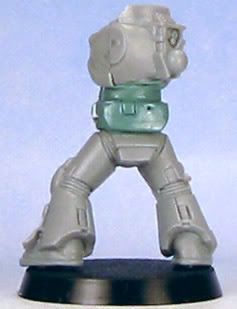
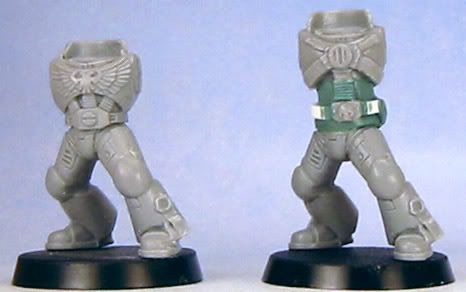
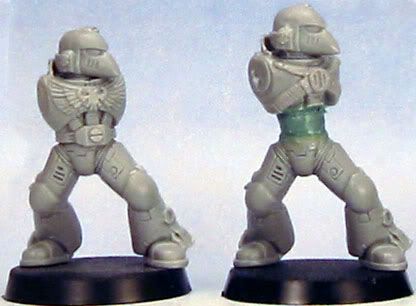
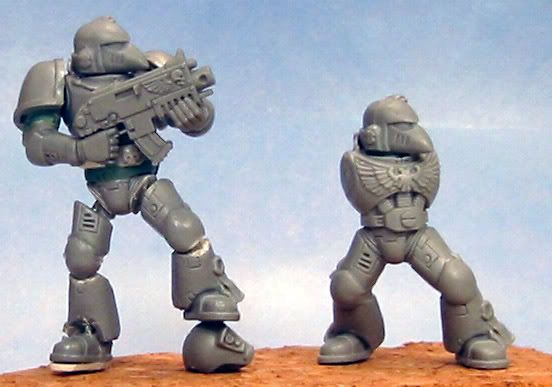
So, I diced up the legs and repositioned him once again. He has now millimetered his way up to being a truely imposing size - just by straightening his legs a bit, and adding a mm or so of space at the top. It still looks a bit off, and I may redo that left leg (it is crooked up on that Tau helmet at the moment).

Let me know what you think.. other then this is turning out to be more work then anticipated :P

Sunday, September 10, 2006


Two Arms!!

Here he is in all his grey plastic glory, my first attempt at a true scale (ish) marine. Forgive the guy on the left - didn't notice until just now that his shoulder guards were missing (oops).

Overall, I think he turned out well, though I will have to make the next few a bit more dynamic in pose - since I'm chopping them up anyway - and I may well reposition this guy's head to be looking down on his foes (as he should). When I get back from my vacation, I'm goign to give the rest of the squad a go - as well as some assault marines. I'm not looking forward to messing with the terminators ;P


Heads Up!

For fun, I tosssed one of the old beaky marines in the photo to show how much taller the marine is from his first generation model. I also evenly lined the photo to get a better idea as to how they even up - the photo is actually a little tilted, so the marine on the right is actually just a little taller then he appears :) I added the foot plates (thanks for the idea), and put the heads back on for their mug shot. I've also finished up the arms (not shown - but I guess you already realized that), and will be assembling the whole thing for painting soon (yes, meanwhile da Todfatha is on his second army).

I like the extra bit of height from the plasticard (which will also be partially under the basing material), helped to further even out the legs. Overall, I'm pretty pleased (after test fitting the arms and all) and am excited to see how it looks finsihed and painted. It shouldn't require too much effort to churn out a few squads at this size - I even have the advantage of assembly lining them, so I can be working on the various stages without as much down time:)

Friday, September 08, 2006


Back and Belt

Added the belt and an armor flap to the rear of the model. My idea for the rear flap was a protective flap to guard the join between the waist and torso. I'm not 100% satisfied with the look, so I may rip that off and rework it completely.

Thursday, September 07, 2006


True Scale, Phase 2

Not too much of an update, but I have added some additional Green Stuff details to the GS core.

I started by adding a rim around the top of the hip joint that actually comes out over the flex ribbing at the top of the legs – to make the hip a bit wider – and I added another armor plate flap to the rear. I then let it cure for the night.

The next morning, I bulked up the core with another layer of GS that I smoothed out (so it looks more like armor, rather then wrinkled fabric ;P ). At this time, I also pushed the excess GS to the front and created the rest of the hose band cover (adding the ribbing with an exacto blade).

Finally, as the GS was curing, I shaved down the belt buckle that I had cut off earlier and pressed it into the correct location – though I may have to later glue this in place.

Once all of this cures, I will be using a little bit of plasticard to make a nice crisp belt, and then (hopefully) I will have a decent looking marine:)

I will likely add a bit of plasticard to the soles of the boots as well – which will give another mm of height or so – and the arms will have to be lengthened slightly (I think I’ll just be adding a wedge to the upper arm to lengthen it a bit).

So far I like it. It doesn’t look too disproportional, and doesn’t require excessive chopping of the miniature (just a complete GS reworking of the waist and lower torso). If I like the look, then it will be worth doing for all the marines in the chapter – though I would likely work on several at a time to speed things up (since there is a bit of curing time between each step).

Wednesday, September 06, 2006

On Heraldry and Symbols


While I am experimenting with scale on my marine model, I figured I’d also address the subject of my squad, company and chapter markings.

Once again I went for something a bit different (getting the sense I do that more often then not), and something to further complicate my life :P

The Company marking is on the left knee pad or greave (the sample IA marine to the left is in the 5th company). The left shoulder pad has the chapter symbol (a silhouetted eagle’s head) in black, while the right pad has the squad type designation (in this case a tactical marine) with the squad number below it towards the front of the marine (II or 2nd squad in the sample).

Originally I had thought about painting the band around the shoulder pad to show what company the marine belongs to (like the Ultramarines), but ultimately decided I liked the black rim on the red pads.

I have also debated changing the squad type designation symbols to black instead of white, may try it on one during this test run and see how it turns out. I had also debated putting the squad number inside of the squad type – putting the II over the arrow in this case – but that may just be too much of a pain in the bottom.

I’ll get my next stage posted soon – been prepping for a trip to Montana (hiking Glacier Park and Yellowstone), so, been busy with that as well. If it wasn’t for this blog challenge, I don’t think I’d even be getting this little done ;P

Monday, September 04, 2006

PC Virus Halts Astartes!

Sorry for the slow weekend – turns out that virus actually kept me busy for most of it :P

Anyway, I spent a little time today trying to come up with a relatively easy way to make my marines a bit bigger. I decided to go for elongating the torso, and adding some bulk to the waist area – two spots I think the marines look a little mis-proportioned.

For the first step, I cut out the lower part of the armor (the part with the hoses) and pinned it in place about 3-4mm higher then it would normally sit. I then Green Stuffed a core piece that I will later add another layer of GS, which I will detail to look like a standard marine lower chest plate and belt. Not sure how this will look when it is done, so, we’ll just give it a shot and see how it looks.

As for size, so far this doesn’t add much height to the model – for that I’d need to add some length to the legs, but that may be more trouble then it’s worth. At the very least, this will make the marines stand about half a head taller then the average marine or guardsman. If he actually stood straight up, instead of crouching, that would give the marine another head in height. Just wish it was easier to add to the legs.

Below is a photo of my first stage, side by side with another marine with the same set of legs.


Friday, September 01, 2006

True Scale?

The model to the left is an old Space Hulk model that I painted for a bit of fun, and to continue to test out the color scheme – sorry for the picture being so blurry. I really like the idea of using the metallic gold/brass/bronze colors for my force – since they are the Golden Eagles after all – though I often think it would be easier to pick a non-metallic color to work with. I may post some work on the color scheme in the next blog when I have a bit more time.

Speaking of time, this weekend will be quite on the blog for me, as I will be out and about for the holiday weekend. I did however breakout all the components for my first marine, and may well tackle a rather ambitious conversion project with this first test model something that will slow me down even further:P

My plan is to attempt to do a more ‘true scale’ Space Marine – something that looks a bit more imposing when standing next to your average guardsman. The marine models always came off a bit stocky to me – and never really made me feel like they were representative of the fluff (with marines ranging from 7-8 feet tall).

Now, I don’t want to go through a process that is so utterly time consuming that each marine takes a week just to convert, so the challenge is going to be working with the existing model and making it a bit larger.

Right now I am leaning towards making the torso a bit longer – and will likely add a little to the arm and leg lengths. This should help make the marine look taller, without requiring too much work. I may also chop up the leg knee joints to straighten the legs a bit more – which should also add to their height.

Anyway, I’ll be working on that idea while traveling and see what I come up with. I’ll do my best to get the first guy modified and posted next week – along with a comparison shot next to an IG model.

Then I’ll realize I am too ambitious and go back to playing WoW...